Exploiting the iOS Trust Model via Configuration Profiles
How legitimate Apple mechanisms can be weaponized without touching a single security boundary
TL;DR
- You don’t always need a vulnerability to impact an iPhone. In many scenarios, social engineering plus legitimate iOS features is enough.
- Configuration Profiles can expand device trust with explicit user approval, while the device still appears “secure” and uncompromised.
- Malicious profile scenarios include forced trust changes (Wi-Fi, certificates, VPN/proxy/MDM settings) that alter traffic visibility and exposure.
- The core risk is not a broken security boundary, but user-approved reconfiguration of trust.
- Defense should focus on profile governance, user awareness, and continuous monitoring for unauthorized profile/certificate/MDM changes.
Abstract
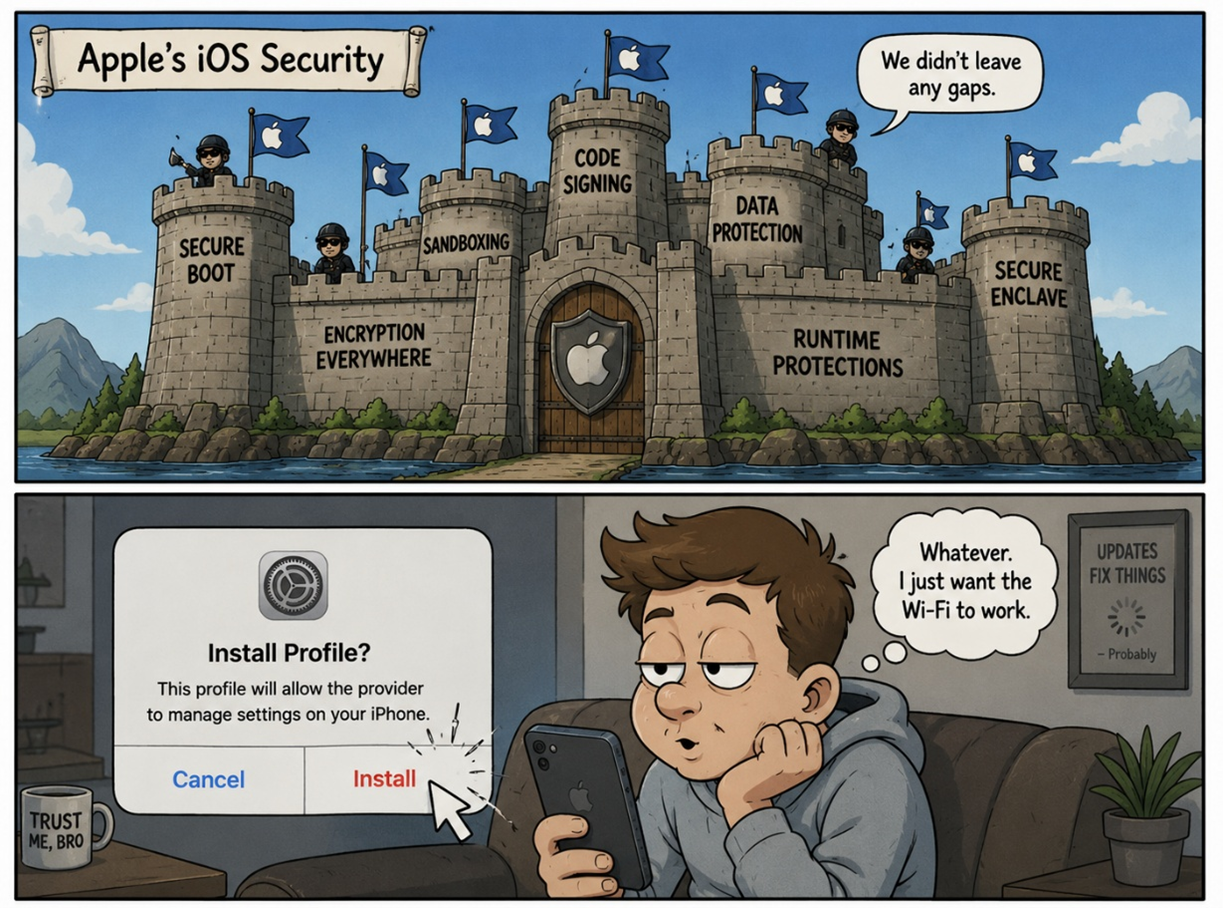
iOS is considered one of the most secure mobile operating systems in the world. Over the years, Apple has built many layers of protection, such as Code Signing, Sandbox, hardware-based security mechanisms, and a relatively closed app distribution model. As a result, when talking about “breaking into an iPhone”, the discussion usually revolves around 0-Day vulnerabilities, complex exploitation chains, Jailbreaks, or advanced spyware of the kind typically associated with state actors or commercial companies with significant resources.
But what if you don’t need to break in at all?
In many cases, an attacker doesn’t need to bypass security mechanisms, exploit a vulnerability, or execute malicious code. It is enough to get the user to give the device an instruction to do exactly what it was designed to do.
This article focuses on one of the most interesting mechanisms in this context - Configuration Profiles, Certificates, MDM components, and additional system settings - which can significantly alter the device’s trust model and its exposure level, without the device being considered “compromised” in the conventional sense of the word, and while still operating entirely within the legitimate mechanisms of the operating system.
Throughout the article, we will examine how configuration profiles can be combined with social engineering techniques, what effects this may have on the user, how such scenarios can be identified, and what can be done to defend against them.
Ultimately, the central argument of the article is fairly simple. Sometimes the easiest way to affect an iPhone is not to bypass its security mechanisms - but to use them exactly as Apple intended. What is known in professional parlance as: “it’s not a bug, it’s a feature”.
Background and Motivation
The smartphone has long since become far more than a communication device. It contains messages, photos, email, financial information, authentication factors (MFA), location history, and sometimes even direct access to corporate systems. For attackers, access to a mobile device can therefore be particularly valuable. In many cases, the phone is not the final target but rather the entry point (Initial Access) - at least to some degree.
When talking about “breaking into an iPhone”, the conversation typically centers around 0-day-level exploitation and advanced spyware. Not by coincidence - iOS is considered one of the most secure operating systems in the world, and Apple invests enormous resources in hardening it. As a result, much of the research and public discussion focuses on the question of how to bypass its protection mechanisms in one way or another.
But… what if you don’t need to exploit a vulnerability at all?
The purpose of this article is not to deal with memory vulnerabilities, bypasses, or sophisticated exploits. Instead, we will examine a much simpler question - can significant impact be achieved against an iPhone without exploiting a vulnerability, without bypassing a security mechanism, and without compromising the operating system?
As we will see, the answer has less to do with lines of code and more to do with the relationship between the user and the device. After all, iOS is built on a strict trust model.
But there is one factor that operates outside those hardening mechanisms.
A factor that almost always makes the final decision.
The user.
Author’s note: During the writing of this article, no Apple security mechanisms were harmed. A number of hypothetical users, however, did click the Install button without reading a single one of the warnings presented to them.

The iOS Trust Model
Before discussing Configuration Profiles, MDM, or what certificates actually are, one fundamental concept needs to be understood - most security mechanisms in iOS are designed to prevent applications, files, or external attackers from performing actions that have not been authorized by the operating system. But what happens when the action was authorized by the user themselves?
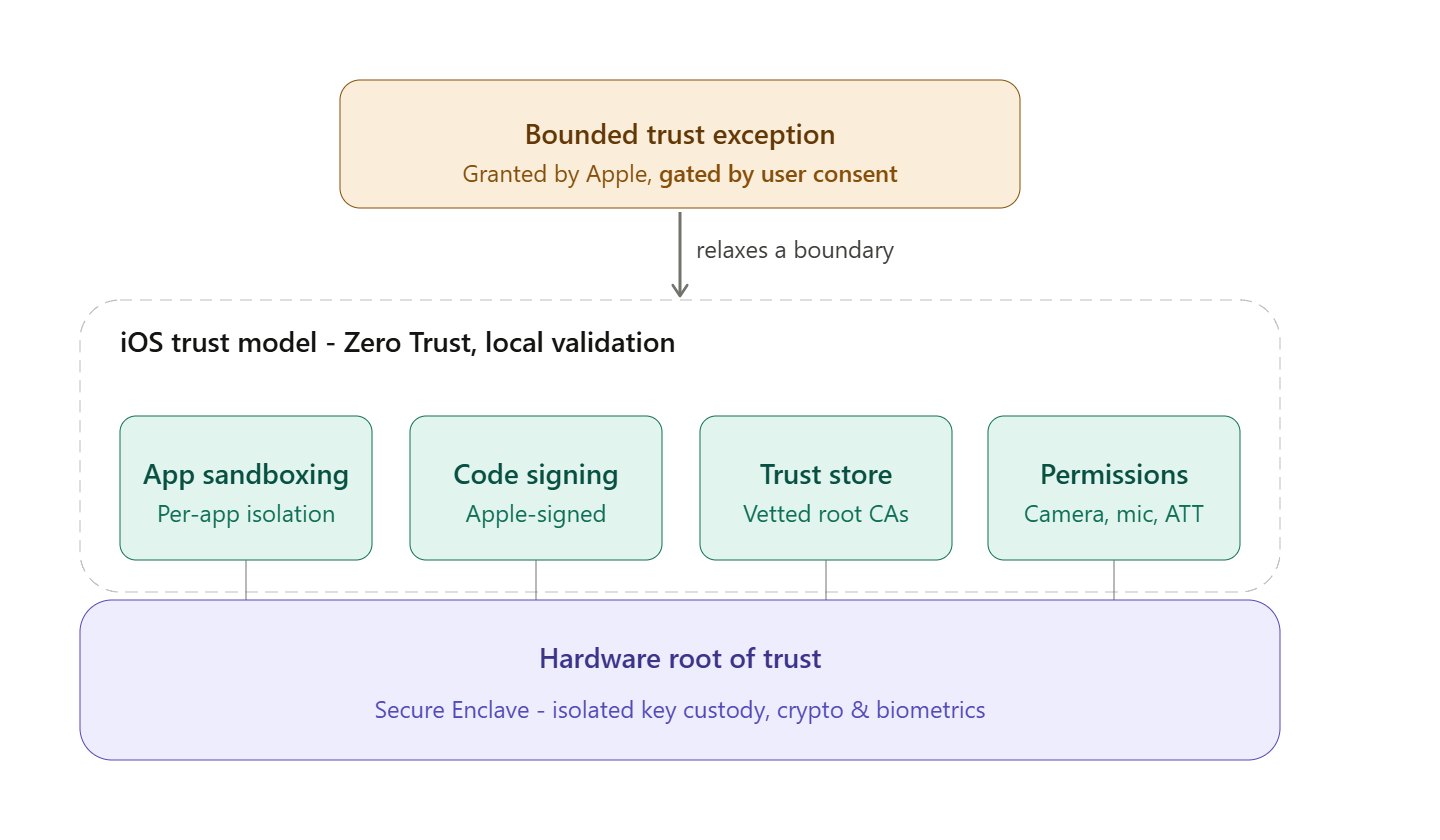
If I had to describe a relatively conceptual “diagram” of the general trust model that the iPhone’s operating system relies on, I would describe it roughly like this:
The Three Layers (Base to Top)
The Purple Layer - Root of Trust: This layer represents the device’s hardware root of trust. Mechanisms such as the Secure Enclave, Secure Boot, and cryptographic key management are designed to ensure the device boots from a known and unmodified trusted state.
The Green Layer - Trust Enforcement: This is where mechanisms such as Code Signing, Sandbox, Trust Store, and a complete access permission model reside. Their role is to ensure that applications and code cannot perform operations the system has not pre-approved, and that unauthorized code cannot run or gain access to system resources.
The Orange Layer - An Exception, but a Controlled One: This is where the story of this article begins. iOS’s model is Default Deny, but in certain cases Apple allows the user to expand the device’s circle of trust. This expansion does not break the security mechanisms and does not bypass them - it operates through them, with explicit user approval. This expansion is carried out using Configuration Profiles. In other words, most iOS security mechanisms are designed to restrict what code can do. Configuration Profiles are interesting for a different reason - they allow the user to add components, settings, and identities that the system would not have trusted by default.
So What Are Configuration Profiles, Exactly?
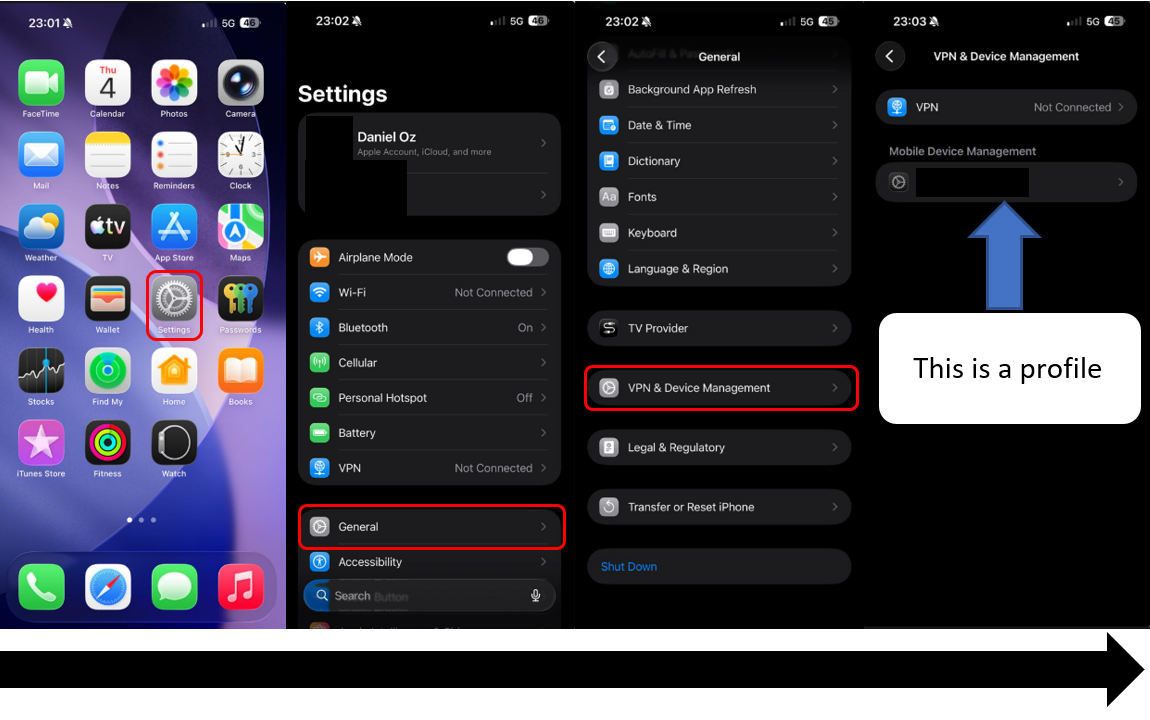
For most iPhone users, this is one of the least familiar features in the operating system. Many users will never encounter it during their device’s lifetime. Those who do typically belong to one of two groups:
- Employees in organizations that use MDM systems.
- People who clicked a link they weren’t entirely sure, in hindsight, they should have clicked.
Configuration Profiles are not a security mechanism - practically speaking, they were born out of an operational need. When organizations began adopting iPhones at scale, a problem emerged: how do you configure hundreds or thousands of devices without going through each one manually?
A typical organization needs to configure for its employees:
- Corporate email accounts
- Digital certificates
- VPN connections
- Wi-Fi networks
- Security restrictions
- Password policies
- Additional organizational settings
Performing all of this manually for thousands of employees is not practical. To solve this problem, Apple introduced a mechanism called Configuration Profiles. Instead of asking the user to configure each component individually, a file can be sent to the target device that tells the operating system exactly which settings to apply.
Technically, a Configuration Profile is a signed (or unsigned) text file with a .mobileconfig extension. It is an Apple Property List in XML format that represents various Payloads - where each Payload can be thought of as a single “configuration unit”.
For example:
- Wi-Fi Settings
- VPN Settings
- Certificate Settings
- Hardening
- and many more...
Each setting is responsible for a different component of the system. Behind the scenes, from the operating system’s perspective, a Configuration Profile is essentially a list of instructions to execute. For example:
<?xml version="1.0" encoding="UTF-8"?>
<!DOCTYPE plist PUBLIC "-//Apple//DTD PLIST 1.0//EN" "http://www.apple.com/DTDs/PropertyList-1.0.dtd">
<plist version="1.0">
<dict>
    <key>PayloadContent</key>
    <array>
        <dict>
            <key>AutoJoin</key>
            <true/>
            <key>EncryptionType</key>
            <string>WPA2</string>
            <key>HIDDEN_NETWORK</key>
            <false/>
            <key>Password</key>
            <string>[WIFI PASSWORD TRUNCATED]</string>
            <key>PayloadDisplayName</key>
            <string>Wi-Fi</string>
            <key>PayloadIdentifier</key>
            <string>com.example.profile.wifi.0</string>
            <key>PayloadType</key>
            <string>com.apple.wifi.managed</string>
            <key>PayloadUUID</key>
            <string>B1E2F89C-C8BF-4F4E-8B05-4F19E618A368</string>
            <key>PayloadVersion</key>
            <integer>1</integer>
            <key>SSID_STR</key>
            <string>[SSID NAME TRUNCATED]</string>
        </dict>
    </array>
    <key>PayloadDisplayName</key>
    <string>Configuration Profile</string>
    <key>PayloadIdentifier</key>
    <string>com.example.profile</string>
    <key>PayloadOrganization</key>
    <string>OrgName</string>
    <key>PayloadType</key>
    <string>Configuration</string>
    <key>PayloadUUID</key>
    <string>8DA0EF1E-6AD4-4B68-A2BB-EDA3E55067E2</string>
    <key>PayloadVersion</key>
    <integer>1</integer>
</dict>
</plist>
Technical breakdown of what we see here:
What is shown above is a Configuration Profile in .mobileconfig format - in practice, an Apple Property List in XML format that defines a configuration profile for an iOS device. The settings are written in Key-Value format.
In this case, the profile contains a single Payload - a managed Wi-Fi setting.
The most important part is:
<key>PayloadType</key>
<string>com.apple.wifi.managed</string>
This tells iOS that this is a Wi-Fi setting the system should add to the device. After installing the profile, the device will recognize a specific Wi-Fi network - including its name, encryption type, and password.
Structurally, there are two layers:
- Payload Content
- Wi-Fi Payload
The outer layer is the profile itself (PayloadType: Configuration) - a general wrapper indicating this is a configuration profile. Inside it is PayloadContent, an array of Payloads. In this case there is only one, but theoretically the same profile can contain multiple Payloads together.
Within the Wi-Fi Payload:
SSID_STR- the name of the network the device will connect toPassword- the network password. In a real profile, the password appears as part of the file in plaintext, making it highly sensitive information. Anyone holding the.mobileconfigfile may be able to see the password if the profile is not properly protected or encryptedEncryptionType: WPA2- the network’s security typeAutoJoin: true- the device will automatically attempt to connect to the network when it is availableHIDDEN_NETWORK: false- the network is not hidden, meaning the SSID is broadcast normallyPayloadIdentifier/PayloadUUID/PayloadVersion- Apple metadata used to identify and manage the Payload
At this stage, this is still a relatively benign example. All we did was ask the operating system to save a network and connect to it automatically. But once you understand that the user can cause the device to accept new network configuration settings, it becomes interesting to ask what that decision means in the real world.
The key takeaway: the user is not typing a Wi-Fi password. They are installing a profile that tells the device how to behave toward a specific network. And that is the interesting difference:
- In a legitimate scenario - an organization distributes Wi-Fi settings to employees.
- In a scenario exploited by an attacker - they can cause a user to install a profile that looks like “Conference Wi-Fi” or “Secure Network Access,” and in practice cause devices to connect to a Rogue AP. From there, a range of attack types becomes possible:
Visibility - the device connects to a network under someone else’s control. Consider the intelligence value of knowing:
- When the user arrived
- How long they stayed
- How many devices connected
- Which services the device is trying to reach
Attack Surface Discovery - when a device is on a given network, it may expose services accessible only via Wi-Fi (depending on organizational configuration):
- Device names
- Service Discovery
- DNS requests
- Internal domains
- Network topology clues
Credential Harvesting Opportunities - additional attacks can be launched to extract information from the victim:
- Captive Portals
- Fake Login Pages
Dangerous combination with additional Payloads - Wi-Fi is one specific Payload, but it can potentially be combined with other Payload types to create a more complex attack chain:
It is important to remember that behind an innocent Install button lies a direct instruction to the operating system: “Add this network, save the password, and connect to it automatically when you see it”. On their own, Wi-Fi Payloads do not grant an attacker access to the device and do not constitute a breach of the operating system. However, their combination with additional Payloads allows an attacker to influence both the device’s communication environment and its circle of trust. In such a state, it becomes possible to create an environment that appears completely legitimate to the user - including corporate portals, authentication services, and various access interfaces - without triggering the familiar warning mechanisms the user expects to see when accessing an untrusted site.
In this sense, the Certificate is not the target - it is the tool that makes the rest of the chain appear trustworthy. Not control over the device, but the ability to make the user stop questioning what they see. That is already a significantly more meaningful impact than just another Wi-Fi connection.

Signed or Not Signed? That is the Question
One of the first questions that comes up is whether a Configuration Profile has to be signed.
The short answer is: No.
iOS allows the installation of unsigned profiles as well. While a signed profile allows the operating system to verify its origin and integrity, an unsigned profile will only display an appropriate warning to the user during the installation process.
It is important to understand - the warning does not prevent installation, it only informs the user of the risk in a general and abstract way. As we will see, this can even be exploited.
At this point I want to clarify an important distinction: a profile is not Malware, it is not ShellCode, not a RootKit, and not an Exploit. It is simply a relatively automated way to perform actions through official, documented mechanisms of the operating system. This is also why using it is so interesting - it does not attempt to bypass iOS’s security model, but rather operates within it.
So where is the problem?
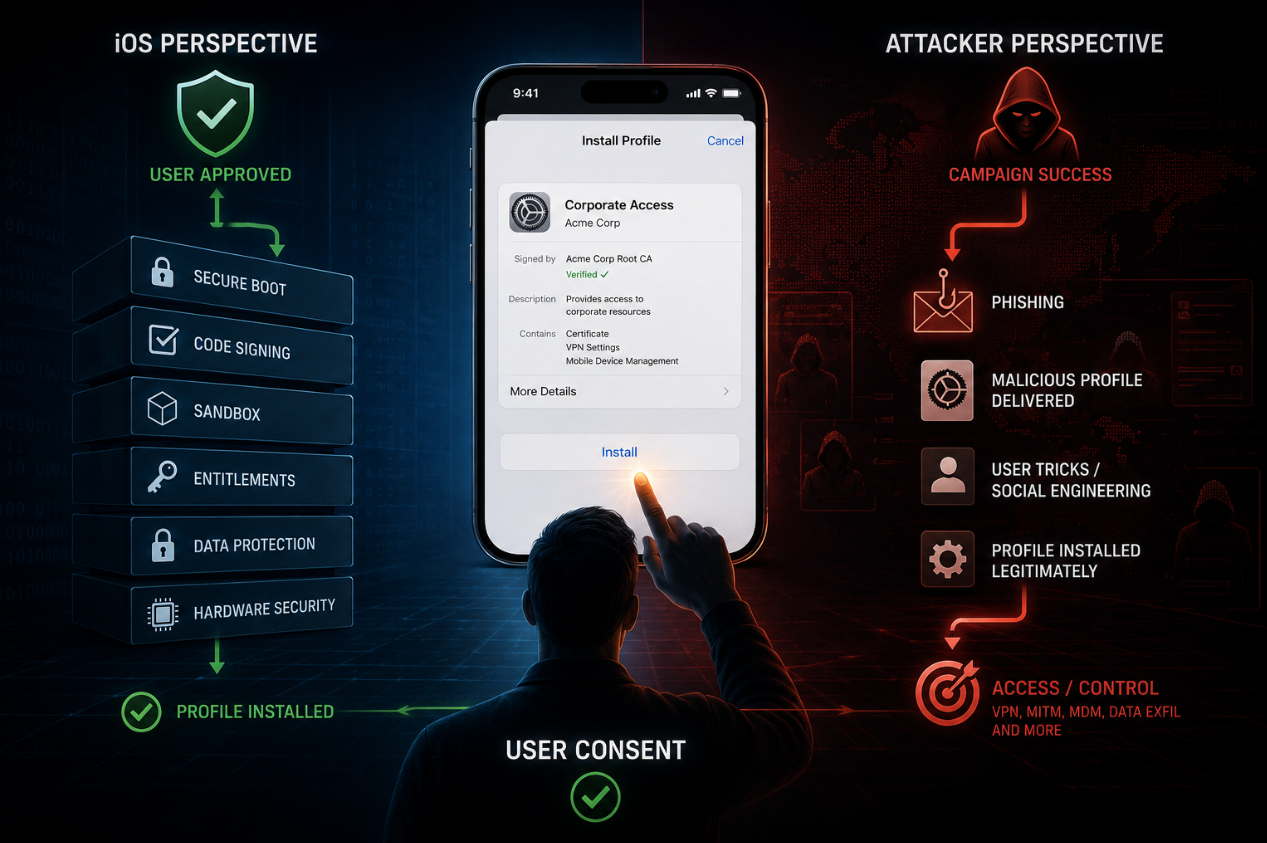
From the operating system’s perspective, the process is straightforward:
- The user received a profile.
- The user chose to install it.
- The user read the warnings.
- The user approved the action.
- The profile was installed.
From the attacker’s perspective, the process looks slightly different:
- Get the user to receive a profile.
- Get the user to install it.
- The fun begins.
The rest is handled by the operating system.
Anatomy of a Configuration Profile
Before we try to convince a user to install a profile, it is worth understanding exactly what we are installing. Behind the “Install Profile” screen hides, at the end of the day, a fairly boring XML file. And as with many stories in the cyber world, the boring things are usually the most interesting.
Not all Payloads are equally interesting. Some are designed for convenience, some for management, and some can significantly alter the device’s trust model.
The following table details the possible Payload types available, as of the time of writing, through Apple. It is not intended for studying each Payload individually - its purpose is to illustrate the breadth of the Configuration Profiles mechanism and the variety of system components that can be configured through it.
| Payload | General Purpose | Payload Type | Why It Is Used | Why It's Interesting (Attacker / Red Team) |
|---|---|---|---|---|
| Wi-Fi | Configure wireless networks (SSID, EAP, WPA2/3, Hotspot 2.0) | com.apple.wifi.managed | Auto-join corporate/known networks without manual setup | Push a rogue/auto-join SSID; preload attacker EAP server to harvest 802.1X creds; force connection to a controlled AP |
| Ethernet | Wired network config | com.apple.*ethernet* | Managed wired endpoints | Same MITM logic as Wi-Fi on wired adapters |
| VPN | Device-wide VPN (IKEv2/IPsec/L2TP) | com.apple.vpn.managed | Tunnel traffic to corporate network | On-Demand VPN = persistence + full traffic redirection through attacker infra |
| App-Layer VPN | Per-app VPN | com.apple.vpn.managed.applayer | Scope VPN to specific managed apps | Selective interception of targeted app traffic, harder to notice |
| Global HTTP Proxy ★ supervised | Force all HTTP(S) through a proxy | com.apple.proxy.http.global | Org-wide content control | Classic MITM: routes all web traffic through attacker proxy |
| DNS Settings / DNS Proxy | Set DNS resolver / DoH/DoT | com.apple.dnsSettings.managed / com.apple.dnsProxy.managed | Enterprise DNS, filtering | Redirect name resolution, silent MITM, covert exfil channel via DNS |
| Relay | Route traffic via a network relay | com.apple.relay.managed | Zero-trust network access | Insert attacker relay into the traffic path |
| Web Content Filter | Filter/inspect web traffic | com.apple.webcontent-filter | Parental/enterprise filtering | Inspect or redirect browsing; basis for surveillance |
| Domains / Associated Domains | Declare managed/associated domains | com.apple.domains / com.apple.associated-domains | Universal links, password autofill | Hijack universal-link routing or autofill association to attacker domain |
| Certificates (incl. Root) | Install CA/identity certs | com.apple.security.root / .pkcs12 / .pem / .pkcs1 | Trust internal PKI, client auth | Install attacker root CA → full TLS interception if user grants full trust; the core of the "user-consent override" risk |
| SCEP | Auto-enroll device cert via SCEP | com.apple.security.scep | Scalable cert issuance | Enroll device identity into attacker PKI; foothold for mutual-TLS access |
| ACME | Modern automated cert enrollment | com.apple.security.acme | Replacement for SCEP, attested keys | Same enrollment-abuse surface as SCEP |
| Certificate Revocation / Transparency | Tune OCSP/CRL and CT policy | com.apple.security.certificaterevocation / .certificatetransparency | Control cert validation behavior | Weaken revocation checking to keep a malicious cert alive |
| Passcode | Enforce passcode policy | com.apple.mobiledevice.passwordpolicy | Security baseline | Weaken policy, or force a lockout (DoS); read posture for targeting |
| Restrictions | Large set of feature toggles | com.apple.applicationaccess | Disable camera, app installs, iCloud, Safari, etc. | Degrade security posture or lock the device down maliciously |
| Single Sign-On / Extensible SSO ★ supervised | Configure SSO providers | com.apple.sso / com.apple.extensiblesso | Seamless auth to internal apps | Insert attacker IdP/extension into the auth path - credential/token interception |
| Configure mail accounts | com.apple.mail.managed | Provision corporate mail | Point mail to attacker server; harvest/relay messages | |
| Exchange ActiveSync | Exchange account setup | com.apple.eas.account | Corporate email/calendar | Same mail-redirection/credential surface |
| Google Accounts | Google OAuth account | com.apple.google-oauth | Provision Workspace | OAuth phishing / token-grab framing |
| Calendar / Contacts / LDAP | PIM accounts & directory | com.apple.caldav.account / .carddav.account / .ldap.account | Provision directory & PIM | Data exfil, recon of org structure, attacker-controlled directory |
| Web Clips | Add home-screen web shortcut | com.apple.webClip.managed | Quick-launch web apps | Plant a fake "app" icon - phishing launcher that looks native |
| App Lock ★ supervised | Lock device to one app | com.apple.app.lock | Kiosk mode | Forced kiosk = targeted DoS / lockout |
| Home Screen Layout ★ supervised | Force icon layout | com.apple.homescreenlayout | Standardize devices | Hide/relocate icons for social engineering |
| Lock Screen Message ★ supervised | Set lock-screen text | com.apple.shareddeviceconfiguration | Asset tagging | Spoof "official" messaging / fake recovery instructions |
| Setup Assistant | Skip/control setup panes | com.apple.SetupAssistant.managed | Streamline onboarding | Skip security/privacy prompts during provisioning |
| Notifications ★ supervised | Per-app notification policy | com.apple.notificationsettings | Manage alerts | Suppress security-app alerts to hide activity |
| AirPlay / AirPrint / Fonts | Misc device services | com.apple.airplay / .airprint / .font | Convenience config | AirPlay/AirPrint can add attacker endpoints; font payload is a minor file-delivery vector |
Not all Payloads in the table are available in every scenario. Some require Supervision - a special state activated through Automated Device Enrollment (ADE) or Apple Configurator with a physical connection to the device. ★ supervised marks these in the table above.
The practical implication is that an attacker distributing a Configuration Profile to a personal device does not automatically gain access to these capabilities. In this sense, the Supervision requirement serves as an additional layer of protection and significantly limits the scope of actions that can be performed via a manually installed profile.
It is important to note that the Supervision requirement does not make a particular Payload irrelevant from an offensive perspective. However, such scenarios require significantly different starting conditions and are not the focus of this article.
So How Do You Actually Create a Configuration Profile?
During the research, one of the first questions that came up was how to actually create such a profile. Officially, Apple has provided tools over the years such as iPhone Configuration Utility and later Apple Configurator, designed to assist in managing and configuring devices. These tools work well, but depend on using Apple’s own products.
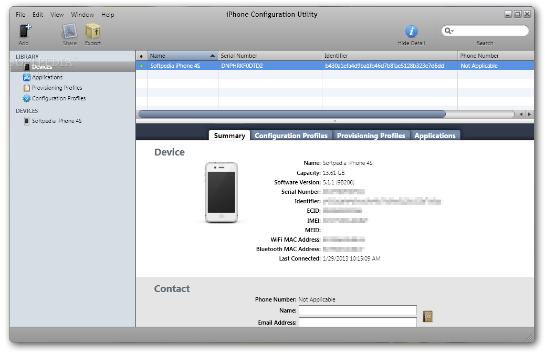
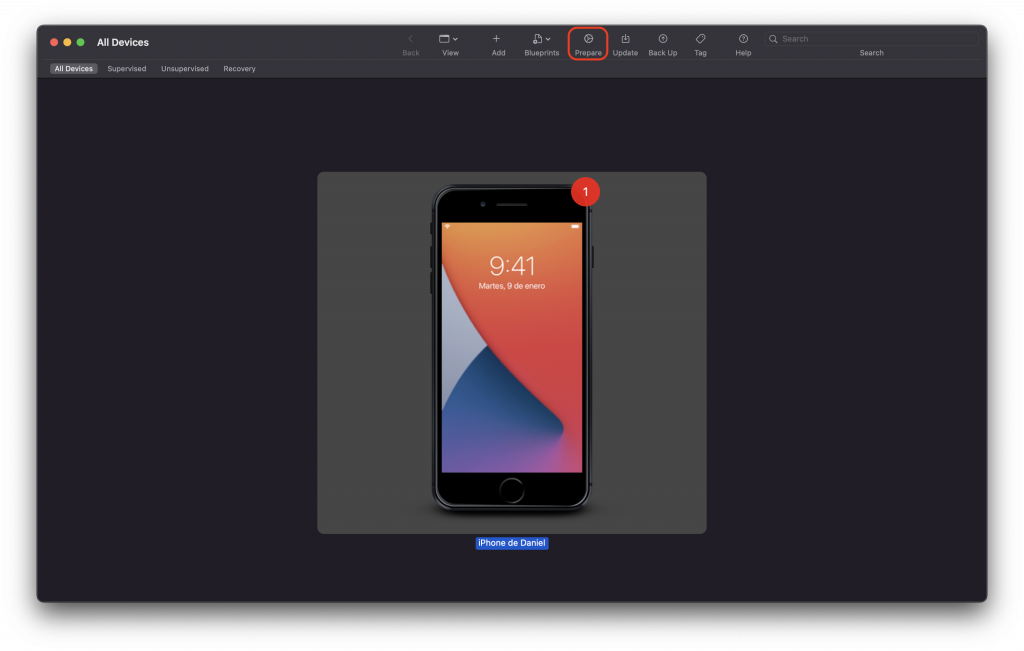
Today, most organizations create and distribute profiles through various MDM systems. But when I tried to find a simple tool that would allow building and analyzing Configuration Profiles for research purposes, I could not find a solution that fit exactly what I was looking for.
But as noted, in practice a .mobileconfig file is ultimately just an Apple Property List in XML format. In other words, there is no magic. If you can produce XML (i.e., write text), you can produce a Configuration Profile.
From this understanding, during the research an open-source tool called ios-profile-builder was built, which allows creating and analyzing Configuration Profiles for learning, research, and security testing purposes.
github.com/danieloz147/ios-profile-builder
The Many Faces of "Trust Me Bro"
So we have arrived at the really interesting part - seeing the impact live and exploring how far each setting can be taken. Throughout this section I will examine several different types of profiles and their potential impact.

But, before we start talking about Web Clips, digital certificates, VPNs, or MDMs, there is one more fundamental question that needs to be answered. At the end of the day, none of the techniques presented below are worth much if the user does not install the profile in the first place.
And this is the central problem that occupies every attacker interested in exploiting Configuration Profiles - how do you get the user to reach the installation screen and click Install?
This is where one of the most interesting and popular social engineering techniques of recent years enters the picture - ClickFix.
ClickFix: Not making the system perform an action, but making the user perform it.
Behind ClickFix is a fairly simple idea - instead of bypassing security mechanisms, you can get the user to perform a legitimate action that the system was designed to allow.
In various campaigns, users were asked to run PowerShell commands, paste commands into a terminal, install browser extensions, approve system permissions, or perform other actions that under normal circumstances would raise suspicion. What all these cases have in common is that the system is not breached. It simply receives a lawful instruction from a user who was convinced to execute it.
You can look at ClickFix as transferring the execution mechanism from the attacker to the user. Instead of running code remotely, the attacker provides instructions. The user executes them. The operating system completes the rest.
At this point, the connection to the world of Configuration Profiles almost presents itself. If iOS does not trust applications but trusts user decisions, and if a Configuration Profile is an entirely legitimate mechanism of the operating system, then the mission is not to bypass iOS’s security mechanisms. The mission is simply to get the user to use them.
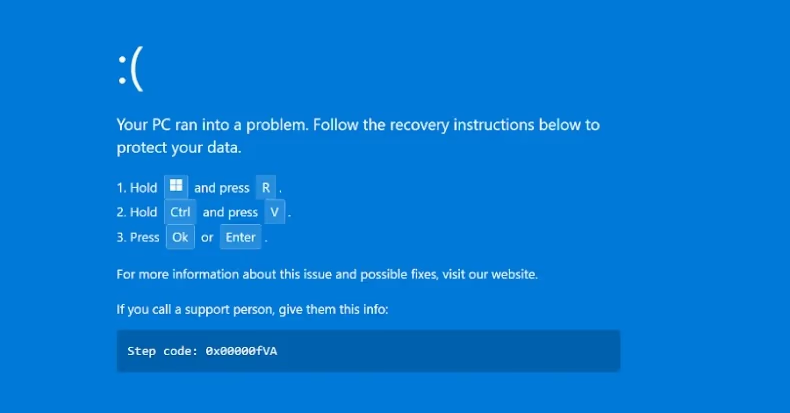
It is important to note that ClickFix is not the only technique, and not necessarily the most common one for distributing Configuration Profiles. In fact, in most scenarios examined later, we are not dealing with ClickFix in its classic sense.
The real value of ClickFix in this context is not in the technique itself but in the way of thinking it represents. Instead of focusing on how to bypass a security mechanism, it focuses attention on how to get the user to perform a legitimate action that the system already knows how to execute.
In this sense, ClickFix served primarily as conceptual inspiration for the research. It provides a convenient way to look at the same fundamental problem - how to get the user to voluntarily expand the device’s circle of trust.
For the purposes of this research, a basic ClickFix template was built demonstrating the referral process for installing a Configuration Profile. In a real scenario, the content, branding, and messaging would be tailored to the target audience and campaign objective.
github.com/danieloz147/ios-clickfix-templates
So How Does the Malicious Profile Reach the User?
If ClickFix answers the question “why did the user click Install?”, another question follows almost immediately - how did the profile reach them in the first place?
A Configuration Profile is no different from any other file. Before it can be installed, the user needs to receive it, open it, and start the installation process. This is where the Delivery stage enters the picture.
In the world of phishing and social engineering, Delivery is the channel through which the content reaches the victim. An SMS message, an email, a link on a website, a QR code, or even a legitimate internal organizational system - all are ultimately just means of delivering that content to the user. In the context of Configuration Profiles, the Delivery stage does not determine what the profile will do after installation. It only determines how the user will be exposed to it in the first place.
The exploits presented later are not dependent on a specific distribution channel. The same profile can reach the user through a wide range of mechanisms, and the examples that follow are examples only. In practice, almost any channel capable of getting a user to open a link or download a file can potentially also be used to distribute a profile.
Trust Me Bro, It's Our App
What Does It Do?
A Web Clip is a Payload that adds an icon to the home screen as a shortcut to a website - nothing more. Despite the appearance, it is not an application, no code is installed on the device, and no additional system permissions are granted.
The main advantage of a Web Clip is that it is configured to open in full-screen mode - the site loads without the familiar browser UI elements the user is used to seeing. The resulting experience closely resembles a dedicated app, especially when the site itself was designed accordingly.
Abuse Case
At first glance, a Web Clip does not appear particularly interesting from an offensive standpoint. After all, you can send a user a link via SMS, email, or WhatsApp just as easily. The key difference is that a Web Clip gives the site a permanent presence on the device’s home screen. With the right choice of name, icon, and UI, it can be made to look like a legitimate organizational app installed by the IT department.
From iOS’s perspective, of course, no application was installed at all. From the user’s perspective, however, the difference is not always obvious.
And this is where it starts to get interesting.
Modern websites now have access to a wide range of Web APIs that allow them to perform actions once reserved almost exclusively for dedicated applications. Depending on user approval and browser-supported capabilities, a website may gain access to:
- Geolocation API - receive geographic location
- Camera API - access to the camera
- Microphone API - access to the microphone
- Notifications API - display Push notifications (in supported cases)
- Clipboard API - read and write to the clipboard
- File Upload APIs - access to files the user chooses to share
- Device Orientation / Motion APIs - data from motion and orientation sensors
- WebRTC - real-time audio, video, and Data Channels communication
It is important to emphasize that each of these capabilities is subject to Safari’s permission and restriction mechanisms. A Web Clip does not bypass the operating system’s security model and does not provide unrestricted device access. However, as long as the Web Clip remains open and is not fully closed, the site can continue using approved permissions without presenting additional requests - a significant advantage for an attacker.
The Delivery Method Used Here (Arbitrarily Chosen)
An SMS message containing the relevant content, crafted to appear as part of an existing conversation thread with a known sender.
Putting it all together - full attack demo:
During the research, I found that the most interesting part is not necessarily the Web Clip itself, but the story built around it. Technically, a Web Clip is just an advanced shortcut to a web page. But when presented as part of a credible campaign - with government-style branding, consistent messaging, and ongoing updates - it becomes a tool of significant power.
This is essentially the principle of “Trust Me, It’s Our App”. The user doesn’t install the Web Clip because they understand what a Web Clip is, but because they believe the story presented to them. Once initial trust is established, the attacker can maintain that trust over time by updating the content, changing the messages, and adapting them to current events.
For the purpose of this research I developed a dedicated C2 server that allows managing and updating Web Clips in a centralized manner. During the work I also found methods that allow making the installation process completely seamless to the user through a specific approach to configuration profile installation - but since that knowledge could be misused excessively, I chose not to detail it in this article.
The main conclusion is that the risk does not stem only from a specific technical capability, but from the combination of ongoing management capabilities with a credible story that succeeds in making the victim see the Web Clip as a fully legitimate application.
Technical Breakdown of the Demo
The video presents WebClip C2 - a Command & Control platform developed for research purposes, demonstrating how Web Clips can be managed centrally, similar to managing Agents in classic C2 systems.
On the right is an iPhone with a Web Clip installed impersonating a legitimate application - in this case “SafeAlert”, simulating an emergency alert and public updates service. On the left is the management interface.
Victim Registration and Identification
Upon opening the Web Clip, the browser communicates with the C2 server and registers as a new device. From that moment it is visible in the control panel with technical details and activity tracking. The system collects:
- Unique installation identifier
- OS and browser details
- Granted permissions
- Connection times and activity log
- Fingerprinting data for consistent victim identification
- Geographic location
The Intelligence tab shows real-time location data received from the device after user approval - illustrating how a Web Clip that looks like an innocent app can collect high-precision location data.
Local Network Recon
The system performs a scan from within the browser environment to identify:
- Default Gateway address
- Active IP addresses
- Accessible ports
- Identifiable internal services
This gives the attacker an initial picture of the network environment where the victim is located.
Harvest Module
The Harvest module centralizes various data collection operations, including:
- Location collection
- Permission enumeration
- Camera and microphone access testing
- Clipboard interaction
- Push Notifications
- Social Engineering Screens
The purpose of these modules is not to exploit a security vulnerability - it is to exploit the user’s trust and the existing browser permission model.
PIN Capture Screen
Near the end of the video, PIN Capture is demonstrated. The operator pushes a dedicated screen to the victim’s device, presenting a UI that simulates a legitimate authentication request. Since the C2 operator controls the page content, messages, design, and social engineering scenarios can be updated in real time.
This is one of the most important points in the research: the real power does not come from one specific technical capability, but from the ability to maintain a credible relationship with the victim over time. The attacker can update the content at any moment, adapt it to current events, and sustain the illusion of a legitimate, actively maintained application.
The full source code is available publicly:
github.com/danieloz147/webclip-c2
Side note: Normally, when a user closes a Web Clip or moves it to the background, its JavaScript environment is suspended and access to permissions stops with it. During the research I found several mechanisms that allow extending the session life and preserving some logic even when the Web Clip is not in the foreground. One method I experimented with used an active media player streaming an imperceptible audio signal, causing the OS to continue treating the app as active. I also developed a second mechanism based on Notifications, not shown in the video. The inspiration came from the way services like YouTube continue executing logic after the user switches to another app or minimizes the browser window.
Trust Me Bro, It's The Company Wi-Fi
What Does It Do?
A Wi-Fi Payload allows pre-configuring a wireless network on the device via a configuration profile. From the user’s perspective, it is a convenient way to automatically connect to a corporate network without entering a password or performing manual setup.
In many organizations this is a completely legitimate process - the IT department sends employees a configuration profile, the user approves the installation, and the device connects automatically to the corporate network. From the operating system’s perspective, this is a normal and familiar management mechanism. From an attacker’s perspective, it is a mechanism built almost entirely on trust that can be exploited.
Abuse Case
Most users have no idea what a Wi-Fi profile actually contains. When presented with a message such as “Install the new corporate network profile” or “Connect to the company emergency network,” most will assume it is a routine action coming from the IT department.
The average user sees a familiar network name, a corporate logo, and instructions that look legitimate. They do not examine the configuration details and do not check what additional settings were included in the profile. And this is where it gets interesting.
For most people, Wi-Fi is infrastructure - something that should “just work.” Precisely because of this, requests related to network connectivity are perceived as less suspicious than installing an application, entering a password, or opening an unknown file. The attacker exploits the built-in trust users have in network connection processes.
The Delivery Method Used Here (Arbitrarily Chosen)
For this demonstration, a relatively simple scenario was chosen: the attacker distributes a flyer that appears to have been sent or shared by the company. The flyer contains a QR Code pointing to the installation site.
The user scans the code, goes through an installation process that looks completely legitimate, and approves the configuration profile installation. After the process completes, the device automatically connects to the Wi-Fi network configured by the attacker.
From the moment of connection, the user can be presented with a Captive Portal or a “user authentication” screen impersonating a legitimate corporate authentication mechanism. From the user’s perspective, this is a familiar process of connecting to the corporate network. From the attacker’s perspective, it is an opportunity to harvest credentials or other sensitive information.
Unlike simply providing an SSID and password, a Wi-Fi profile allows the attacker to pre-configure all connection details, precisely choose which networks the device will join, and create an onboarding experience that looks like an official, managed IT process.
Putting it all together - full attack demo:
Similar to the Web Clip scenario, the power of this attack does not come from a particularly complex technical mechanism, but from the trust the user places in the process. The user connects to the network not because they checked the configuration details, but because they believe it is the legitimate corporate network. It is precisely at this point that a legitimate management mechanism becomes an effective tool in a social engineering-based attack chain.
Technical Breakdown of the Demo
The video presents a full scenario in which a user is asked to connect to the wireless network of a fictitious organization called Aurora Energy Group. The process begins with a dedicated landing page presenting the connection process as a routine IT procedure, providing the user with clear instructions for installing the configuration profile. After approving the profile on the iPhone, the system automatically configures a new Wi-Fi network named Aurora-Employee, and the device connects to it without requiring any password entry or additional user action.
Immediately after connecting, a Captive Portal appears - designed as a seamless continuation of the branding and experience presented in the previous steps. The portal displays a corporate authentication screen and asks the user to enter their credentials to “complete the connection.” From the user’s perspective, this is a unified and continuous process of connecting to the corporate network. From the attacker’s perspective, it is a chain of entirely legitimate components leading to credential harvesting.
The demo illustrates how standard Wi-Fi and Captive Portal mechanisms can be leveraged to create a credible and convincing user experience, without relying on security vulnerabilities or bypassing operating system protections.
Trust Me Bro, Route Everything Through Me
What Does It Do?
A VPN Payload allows configuring a VPN connection on the device via a configuration profile. After installation, the device can route its network traffic through a pre-configured VPN server, without any manual setup required from the user.
Organizations make extensive use of VPN as an integral part of their network access infrastructure, particularly for remote employees or mobile devices.
Unlike Proxy-based configurations, a VPN solution generally offers broader coverage of network traffic. Since routing occurs at the operating system level, most applications cannot easily bypass it - resulting in more consistent control over the device’s communication paths.
That said, there is also a significant difference in terms of user visibility (OPSEC). Modern operating systems typically display a clear indicator when a VPN connection is active - either through a dedicated icon or a status bar indication. In practice, many users tend to ignore this indicator or do not understand its significance, but it is still a visual cue that does not always exist with other mechanisms.
Although similar results can be achieved using a Global HTTP Proxy Payload, I chose to focus on VPN since it does not depend on Supervised Device management requirements. For this research scenario, VPN provides a simpler, more practical, and more realistic attack chain.
It is also important to note that installing a VPN alone does not automatically grant the ability to inspect or decrypt HTTPS traffic. To do so, a trusted Root CA certificate must also be deployed to the target devices. Technically, the certificate can be included as part of the same configuration profile, but modern operating systems have additional protection mechanisms that require the user to explicitly approve trust in the certificate.
This creates an additional friction point in the deployment process. In my experience, users do not make such decisions based on a technical understanding of what a Root CA means, but based on their level of trust in the party requesting the installation. Therefore, as with other management mechanisms discussed in this article, the most significant factor here is not purely technical - it is human. The ability to convince the user that this is a legitimate component required for security improvement, troubleshooting, or access to organizational services.
Abuse Case
Most users do not understand the practical implications of installing a VPN profile or the extent of its effect on device communications. When presented with a message like “Security update required for access to company services” or “Install Secure Access Gateway to improve browsing security,” they will typically treat it as just another technical step in the corporate onboarding process.
From the user’s perspective, nothing changes materially. Applications continue to work, websites continue to load, and daily work continues as normal.
From the attacker’s perspective, however, the device may begin routing a significant portion - or all - of its network traffic through infrastructure under their control.
The Delivery Method Used Here (Arbitrarily Chosen)
For this demonstration, a scenario was chosen in which the attacker sends an email impersonating an official communication from the IT department. The message presents a security initiative or infrastructure upgrade and includes a QR Code pointing to a dedicated installation page.
From the user’s perspective, this is just another routine organizational process designed to improve browsing security or access to internal services.
Upon completing the installation, the new network settings are applied to the device, and the user continues using it completely normally - without being required to take any further action. For the user, this is a standard onboarding process. For the attacker, it is a new control point obtained through social engineering alone.
Putting it all together - full attack demo:
Technical Breakdown of the Demo
The video presents a scenario in which a user receives a message impersonating an official communication from the organization’s IT department. The message describes recently discovered connectivity issues and invites the user to install a new network configuration update by scanning a QR Code attached to the email.
After scanning the code, the user is directed to a dedicated installation site and installs a configuration profile containing VPN settings. The installation process is presented as part of a legitimate infrastructure upgrade designed to improve connection stability and access to organizational services.
Upon completion of the installation, the device establishes a VPN connection and begins routing network traffic through the infrastructure configured in the profile. On the attacker side, the new device appears in real time in the management interface - including its assigned IP address, connection status, and additional activity information.
The video then demonstrates several modules for analyzing traffic passing through the infrastructure, including service and site classification, domain information observed in traffic, usage statistics, and additional data collected as part of monitoring activity.
One of the interesting aspects of this scenario is that it can serve as an initial stage in a broader attack chain. Instead of relying on an exploit or code execution, the attacker achieves an initial foothold through legitimate management mechanisms and the trust the user places in them.
Trust Me Bro, I'm IT
What Does It Do?
An MDM Enrollment Payload allows registering a device with a Mobile Device Management system. After enrollment, the management server can manage various aspects of the managed device according to the permissions granted, the profiles installed, and the organizational policy configured.
MDM is one of Apple’s central management mechanisms, used by organizations worldwide to manage endpoints, distribute configurations, install profiles, enforce security policies, deploy digital certificates, configure VPN, Wi-Fi, corporate email, and more.
Unlike the other Payloads covered in this article, MDM is not interesting because of one specific action it can perform. It is interesting because it changes the relationship between the device and the server. Instead of installing a single component, the user grants the server the status of an administrative authority. From that point on, many of the actions presented in earlier sections can be carried out as part of the system’s legitimate management mechanism. In a sense, this is the Final Boss of the Trust Me Bro series.
Abuse Case
Most users do not fully understand what enrolling a device in an MDM system means. When presented with a message like “Your device needs to be enrolled in company services” or “Install a management component to access organizational resources,” most will treat it as a natural part of the IT process.
From the user’s side:
- They see official iOS system screens
- They see the term Remote Management
- They see the organization’s name
- They see the system itself requesting approval
Precisely because all of these elements come from the operating system, they reinforce the sense of legitimacy and reduce the user’s level of suspicion. In practice, the user does not approve the enrollment because they understand what an MDM system is or what permissions they are granting. They approve it because they trust that the party in front of them is the IT department.
And that is exactly the point that makes this Payload unique.
If each of the previous sections dealt with exploiting a single management mechanism - Web Clip, Wi-Fi, VPN, or Certificates - MDM sits above all of them. It is not just another Payload; it is a mechanism capable of deploying and managing many of those same components as part of a legitimate management process.
The Delivery Method Used Here (Arbitrarily Chosen)
For this demonstration, a scenario was chosen in which the user connects their iPhone to a computer controlled by someone impersonating IT. The user is asked to approve the “Trust This Computer” prompt as part of a support, diagnostic, or device enrollment process.
After approving the Trust, a Pairing Record is created between the computer and the device. From this point, legitimate tools such as pymobiledevice3 can be used to communicate with iOS management services via Lockdown and usbmux interfaces. In the demonstration scenario, the tool is used to install a configuration profile that initiates MDM Enrollment - using Apple-supported mechanisms and without exploiting any operating system vulnerability.
The key research point is that the user does not perceive the Trust action as granting significant administrative access. From their perspective, it is a momentary technical approval required so that “the computer can recognize the iPhone.” In practice, this is an important trust transfer - once the device is paired, the computer gains the ability to perform certain management interactions with the device as long as iOS restrictions, lock state, and user permissions allow it.
Important note: Contrary to what is sometimes assumed, enrolling a device in an MDM system does not turn the MDM server into a C2 and does not grant unlimited control over the device. Even after enrollment, the MDM server is subject to Apple’s permission model and management capabilities, and cannot perform arbitrary actions or execute code freely.
That said, precisely because this is a legitimate, high-trust management mechanism, it can serve as an effective starting point for a broader attack chain. After the user completes the enrollment process, additional management components supported by the platform can be deployed, additional organizational policies can be applied, and further management actions can be performed as part of the relationship established between the device and the server. There is the possibility of taking the scenario further - but since this article is already long, that will be discussed in a separate article.
Putting it all together - full attack demo:
Technical Breakdown of the Demo
For the demonstration, a personal MDM server was built specifically for this research. The reason for choosing a personal MDM server was to illustrate that the enrollment and trust mechanism presented by iOS is identical to the one used by organizations in production environments.
At the end of the demo, the device has successfully enrolled in the MDM server and appears in the management console as a managed device. This is where the scenario presented in this article ends. Unlike the previous sections, where the focus was on the capabilities of a single Payload, the emphasis here is on establishing an ongoing relationship between the device and the management server - a relationship from which further management actions can continue to be performed within the scope of Apple’s legitimate capabilities.
To reproduce the research environment, a full infrastructure was developed based on pymobiledevice3 and an MDM server, including all setup components, scripts, and instructions required to build an identical research environment. The full source code, installation instructions, and project documentation are available here:
github.com/danieloz147/nanohub-and-mdm
Important tip: To enhance the sense of legitimacy, a public MDM service offering a free trial can be used. As a result, the enrollment process occurs against a real MDM server, and the profile presented to the user is signed and identified by iOS exactly as it would appear in a legitimate corporate enrollment. From the user’s perspective, there is no indication that the environment belongs to an attacker.
Such services are available at:
- SimpleMDM - offers a free trial after registration - simpleMDM.com
- Jamf Pro - offers a free trial after registration - jamf.com/products/jamf-now
- Mosyle - offers a free plan for small organizations (up to a limited number of Apple devices), as well as extended trial periods for advanced plans - mosyle.com
What Comes Next
Although this article covered a wide range of Payloads supported by Apple Configuration Profiles, it is far from exhausting all the possibilities the platform offers. Its purpose was to present the key friction points between legitimate management mechanisms and the trust users place in them - not to serve as a complete map of all iOS capabilities.
Throughout the work, I focused primarily on scenarios where the user is the central and weakest link in the chain.
One topic not covered in this article - but which will be the focus of the next research - is examining the boundary between Apple’s legitimate management mechanisms and the ability to turn them into a persistent management platform. The next article will examine what can be done after trust has already been granted. It will present scenarios including managed application deployment, establishing a persistent communication channel (C2) based on legitimate platform mechanisms, and combining additional management capabilities to understand how far the boundaries of MDM can be stretched without exceeding Apple’s security model. In other words, if this article was about creating the relationship - the next one will be about how far it can be taken.
Finally, I believe the most interesting part is not technical at all. Ultimately, every scenario presented in this article rests on the same simple premise: users do not place their trust in technology - they place their trust in the story told to them. Understanding the relationship between Apple’s management mechanisms and users’ perception of trust is, in my view, one of the most interesting research directions for offensive security.